
Event Triggers
This page explains how to use Event Triggers within your pro or enterprise account. Event Triggers allow you to define specific events to trigger actions within your account.
At this time, event triggers support listening for S3 uploads within our bucket. The uploaded files are uploaded into your account as a user list. In the future, more events & actions will be supported.
Creating your first Event Trigger
Event triggers are accessible to pro & enterprise level accounts from the Automation page under the “Event Triggers” tab.
To create an Event Trigger, choose an event & action from the drop down menus. Click create trigger to open the event trigger configuration dialog. You may configure or review any details about your trigger here. Click “Create” in the bottom right of the window when you’re satisfied with the configuration.
It can take up to 15 minutes for event triggers to become fully available for triggering, depending on the event type.
Managing your triggers
Triggers can be deleted by clicking the red “trash” button. This will remove all configuration for the event in our platform & any connected third parties. You can also click the grey gear icon to view or configure the event trigger. Configuration options vary by event & action.
Triggering an S3 event
At this time, we support events from S3 uploads in specific folders of our bucket. We support this via presigned PUT urls, which provide temporary access to upload an object at the specified key. To trigger an S3 Upload event, do the following:
Obtain a presigned PUT url for the S3 Upload event (2 options)
From your dashboard: Open the trigger settings & click “Generate Presigned URL”
From our API: Use the trigger number & your api key to obtain a valid presigned URL.
Make a PUT request to the URL generated in step 1. This is possible to do via API requests or from no-code third party platforms.
CURL example:
curl -X PUT -T "/path/to/file" "<presigned-url>"Postman:
Setup a new PUT request to the presigned URL.
Set the body type to “Binary”
Attach a file & hit “Send”
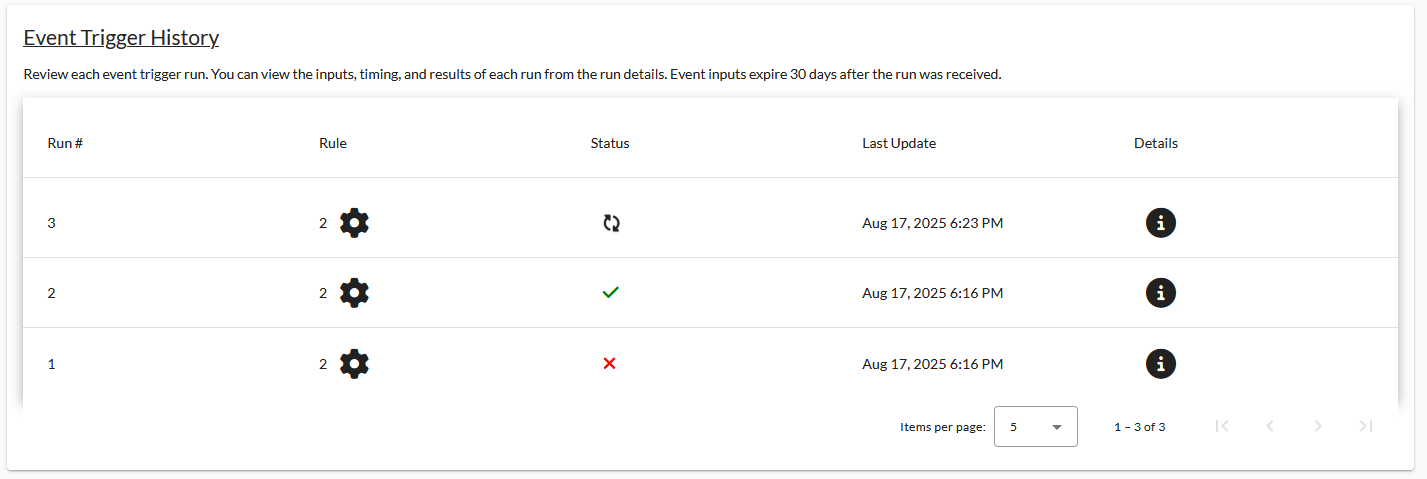
Once the file has been pushed to S3, your dashboard will update with a new trigger run directly under the “Manage Event Triggers” section. The run status is updated in real time, you don’t need to refresh the page for updates.
Click the grey information icon for details about the event trigger run.
Webhook Triggers
We also support actions in response to incoming webhook events. Actions correspond to API calls found here and here. To set up a webhook event, do the following:
Copy the webhook URL shown in the New Event Configuration dialog box.
Note the arguments for the action's corresponding API call as described in the documentation linked above.
For each argument, put its name and the path to its value in the webhook JSON in one of the pairs of "Argument" and "Path" fields above.
You may specify your own optional token and the path to it in the webhook JSON in the "Security Token" and "Security Token Path" fields above.
Once the trigger has been created, make a POST request to the webhook URL with JSON that contains the specified values. Your dashboard will update with a new trigger run directly under the “Manage Event Triggers” section. The run status is updated in real time, you don’t need to refresh the page for updates. Click the grey information icon for details about the event trigger run.